
If you’re seeking a tutorial on how to start a blog with WordPress, I’m guessing you already know what a blog is, have done some research into alternative blogging platforms, and determined that WordPress is indeed the best option.
I’m also assuming that you’re starting your blog to make money. If you just want to start your blog as a hobby, that’s fine too; WordPress is still the best option. However, you may want to check this post I wrote on how to make money blogging. If you are already doing something for free, you might as well get paid for it, right?
With that in mind, the focus of this post will be on setting up a WordPress blog that can be monetized. Now, back to WordPress.
WordPress is free software that, through drag-and-drop technology, allows you to build websites without web development experience. WordPress powers over 43% of all websites on the internet, making it the most popular platform for creating websites.
You may have noticed that if you google “WordPress,” two websites come up at the top of search results. These websites are WordPress.org and WordPress.com, and you may be confused as to which one to use. The main difference between these two sites is that a WordPress.org website can be monetized and customized, whereas a WordPress.com website cannot.
Another big downside to WordPress.com is that your website will be placed under a subdomain. For example, if your blog name is “eMoney Lover”, you won’t be able to use emoneylover.com as your domain name. Instead, your domain name will be emoneylover.wordpress.com.
The only apparent advantage of WordPress.com is that it allows you to host your blog or website for free, whereas WordPress.org requires you to use a third-party company to host your website.
A web hosting company is a company that has advanced servers which run 24/7, allowing your website to be live and accessible to the internet at all times of the day. Web hosting companies demand a hosting fee, as one would anticipate, but this is a minor price to pay compared to using free hosting on WordPress.com and being unable to profit from your blog.
I recommend you use Bluehost as your web hosting provider because they offer the most affordable pricing on the market (starting at $2.95 per month). Bluehost’s platform also integrates seamlessly with WordPress software, and as such is recommended by WordPress (the company) itself as one of the best hosting companies for their software.
Another great advantage of using Bluehost is their excellent customer service. This company has live chat support on standby 24/7. I use this company to host all my websites, and their customer support has been nothing short of amazing.
This post will therefore show you how to start a WordPress blog through Bluehost, and I’ve outlined the seven steps you’ll need to take when starting a blog, followed by a detailed explanation of each one.
How to Start Blog step-by-step with Bluehost and WordPress
- Pick a niche or topic that you want your blog to focus on
- Pick a domain name for your blog
- Get Web hosting
- Install WordPress on your website
- Install important plugins
- Customize your website design by changing the theme of your website
- Write your first blog post
1. Pick a Niche
When blogging are no rules when it comes to your style of writing. You can write about completely unrelated topics if you want. However, if you want Google to take you seriously and show that you are an expert in a particular subject (this is important if you want to get monetized and rank high on Google search results), you may want to stick to one topic, aka a niche. This blog, for example, is focused on how to make money online.
Another factor taken into consideration before your blog can be monetized is whether your blog is receiving any traffic. Traffic is defined as the number of people visiting your website and reading your content.
To make sure that your blog is getting traffic, you need to blog about things that people are searching for, things that they actually want to read about. These topics that people search for on Google are called keywords, and to get those keywords, I use an SEO tool called Semrush.
Finding keywords is a crucial part of blogging because it allows you to do the following:
- To come up with a niche for your blog
- To come up with topics for your blog posts
- To ensure that your blog receives traffic because these are topics that people are actively looking for
- To think of a domain name (as seen in the following section)
N.B: Once you’ve logged into Semrush, look for keywords with a high search volume and low keyword difficulty. High search volume indicates that many people are searching for that topic, and low keyword difficulty means a few bloggers are writing about it, making it easier for your site to appear on the first page of Google.
Tip: Semrush may be a bit pricey for bloggers who are just starting but they do offer a free trial. You can use the free trial to search for your keywords in bulk before it expires.
Sign up for your free Semrush trial here.
2. Pick a Domain Name
Your domain is your website’s name or address (for example, this blog’s domain is emoneylover.com).
Although you can name your domain whatever you want, it is advisable to give it a name related to your niche. For example, I blog about making money online, and such, I have included the word “money” in my domain name.
When picking a domain name, you also want to make sure that the name is short and easy to remember. Your dedicated readers will most likely return to your site on their own once you’ve built a following through Google SEO or other ways such as Pinterest.
In order to do so, they will use Google’s address bar to search for your blog. For this reason, you should choose a domain name that is easy to remember. No one is going to remember something like strategiestomakemoneyonlineandliveyourbestlife.com, for example. (Ok, that’s a bit of an exaggeration, but you get my point)
Domains cost about $15 per year on average, and you can purchase one from any web hosting company like Bluehost. It’s best to get your domain from the same business that hosts your website for technical reasons.
It can be a bit tricky to get a good domain as most of the good ones for any given niche will already be taken. Use the domain search tool below to see if the domain name you want is available. Bluehost gives you a free domain when you sign up for their hosting (as seen in the following section).
3. Get Web Hosting
Click here for the official Bluehost web hosting page and you will be taken to the screen below.
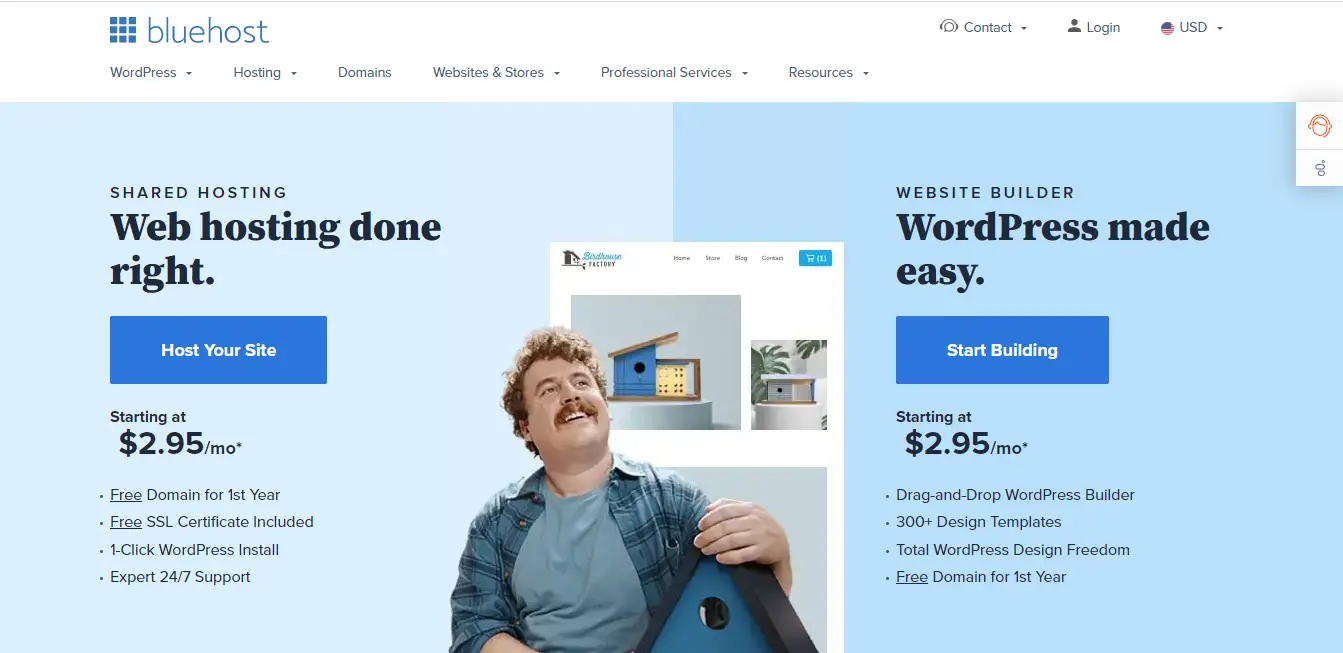
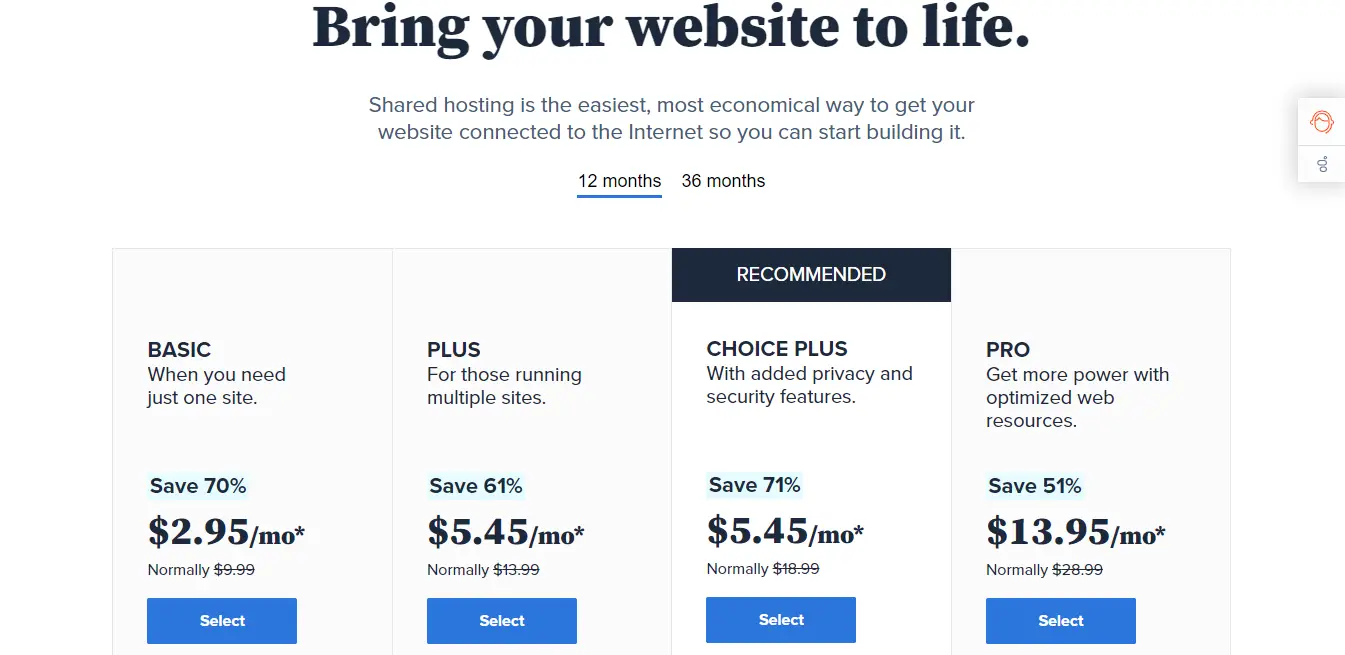
Click the “Host Your Site” button and you will be taken to the available hosting plans. Choose the plan that best fits you. If you simply intend to create one website, you can go with the basic option. I’m a web developer with a couple of websites so I went with the second choice.
Once you have selected your hosting plan, the next screen will ask for your domain name.
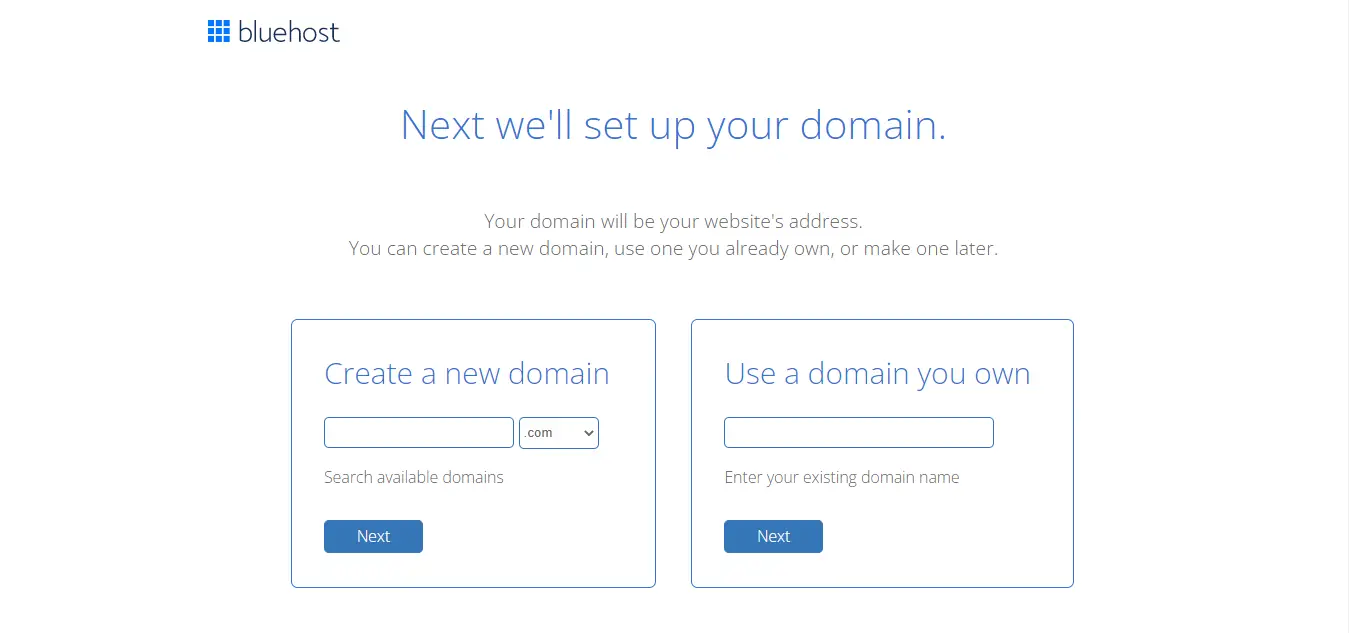
If you don’t have a domain name and want to claim the free domain that comes with this hosting plan, type the name of the domain that you wish to possess into the Create a new domain box.
If you try to enter a domain name that is already taken, the system will prompt you to try again until you find one that is available.
If you have already purchased a domain, enter it in the Use a domain you own box and click Next.
You can also choose to skip this step and assign a domain to your website once you have purchased your hosting.
You will be prompted for your personal information on the next screen. Make sure you complete all mandatory fields.
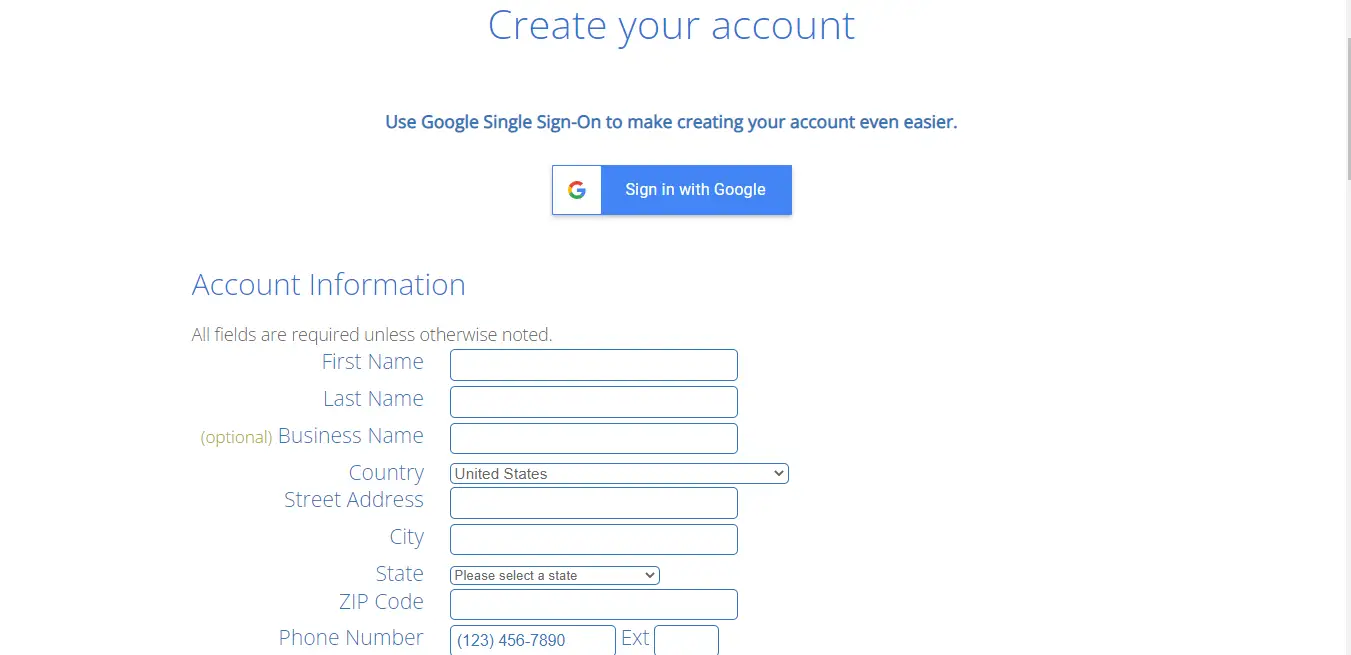
As you scroll down, you will be asked to select some package extras. I usually tick the Domain Privacy and Protection box only and leave out the rest as these are extras that I can do without.
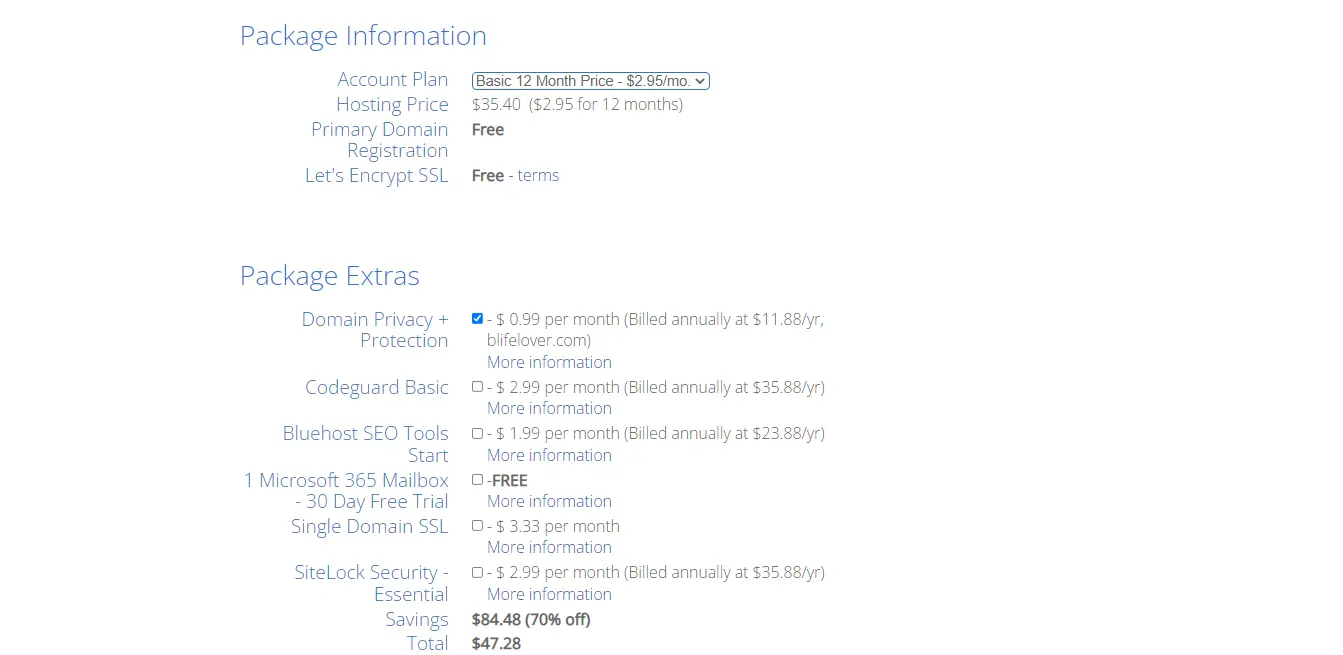
Please note that Bluehost only allows you to purchase either a full year or 3 years of hosting. There’s no option for monthly payments. If you can, you may pay for 3 years as you will get huge savings. If you are on a tight budget, however, go ahead and select the default 12-month plan.
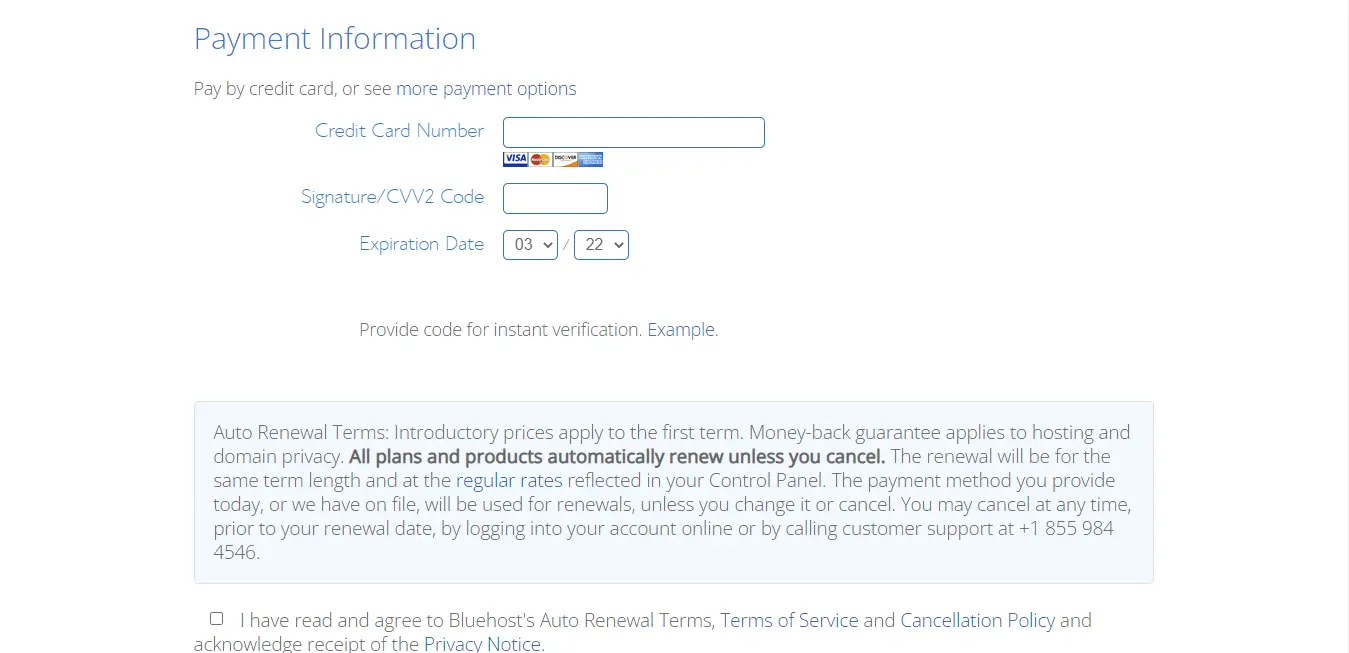
The final step is selecting a payment plan and accepting the terms and conditions. The default payment method is card payment, but you can click on more payment options to select another payment method like PayPal.
Congratulations! Once your payment goes through, you have successfully purchased hosting with Bluehost. Bluehost will now prompt you to set up your account and password and then login into the platform.
4. Install WordPress on your Website
Installing WordPress on your website is the next step.
When you initially log into Bluehost, you’ll be greeted by a setup wizard that will help you to create your website and install WordPress step by step. Follow the setup wizard step by step and make sure that in the final stage, you choose the WordPress with Limitless Customization option.
Once WordPress has been successfully installed, you will be taken to Bluehost’s Control panel (see picture below). This section allows you to browse and manage all of the websites and domains associated with your Bluehost account (don’t worry about this area if you only have one website).
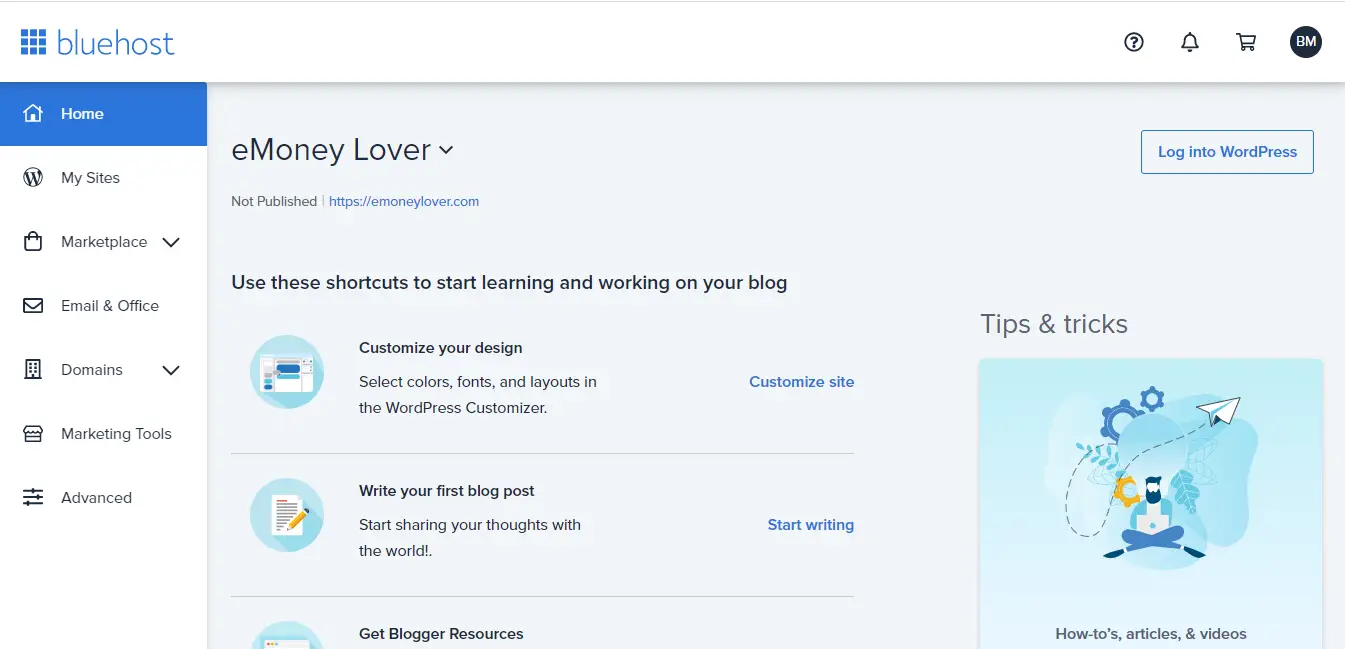
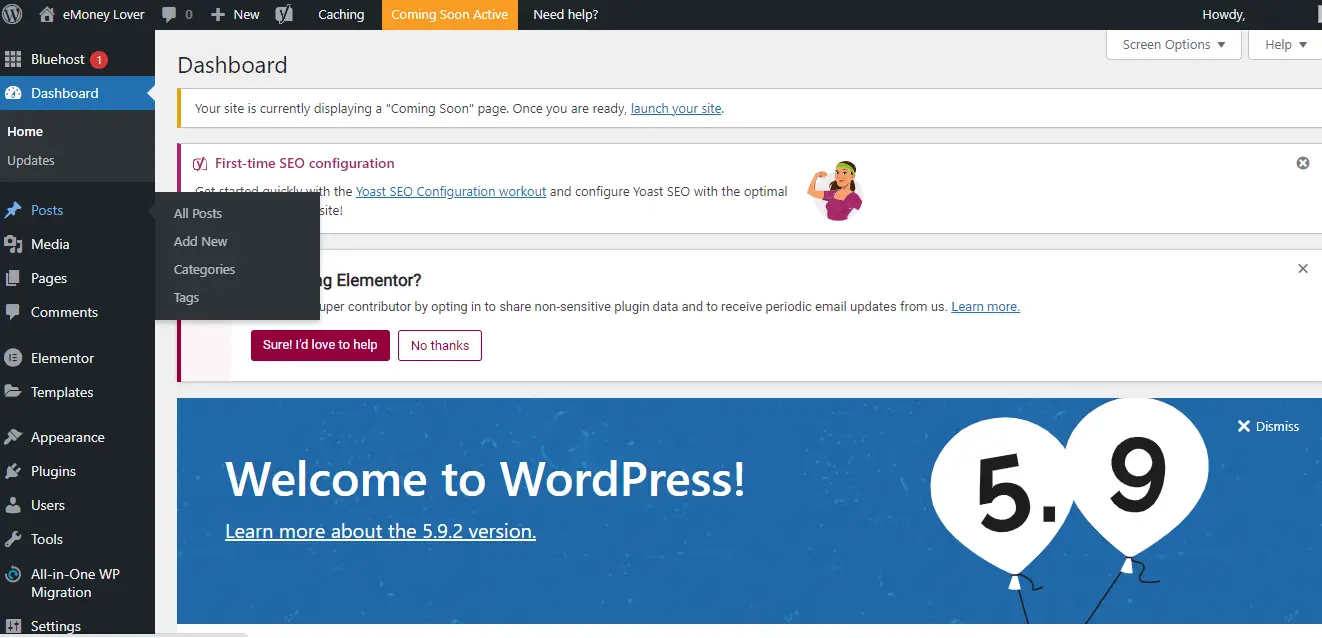
Click the Log into WordPress button on the top left corner, and you will be taken to the WordPress dashboard of your blog (as seen below). This is where you will be able to customize your blog and start writing your posts.
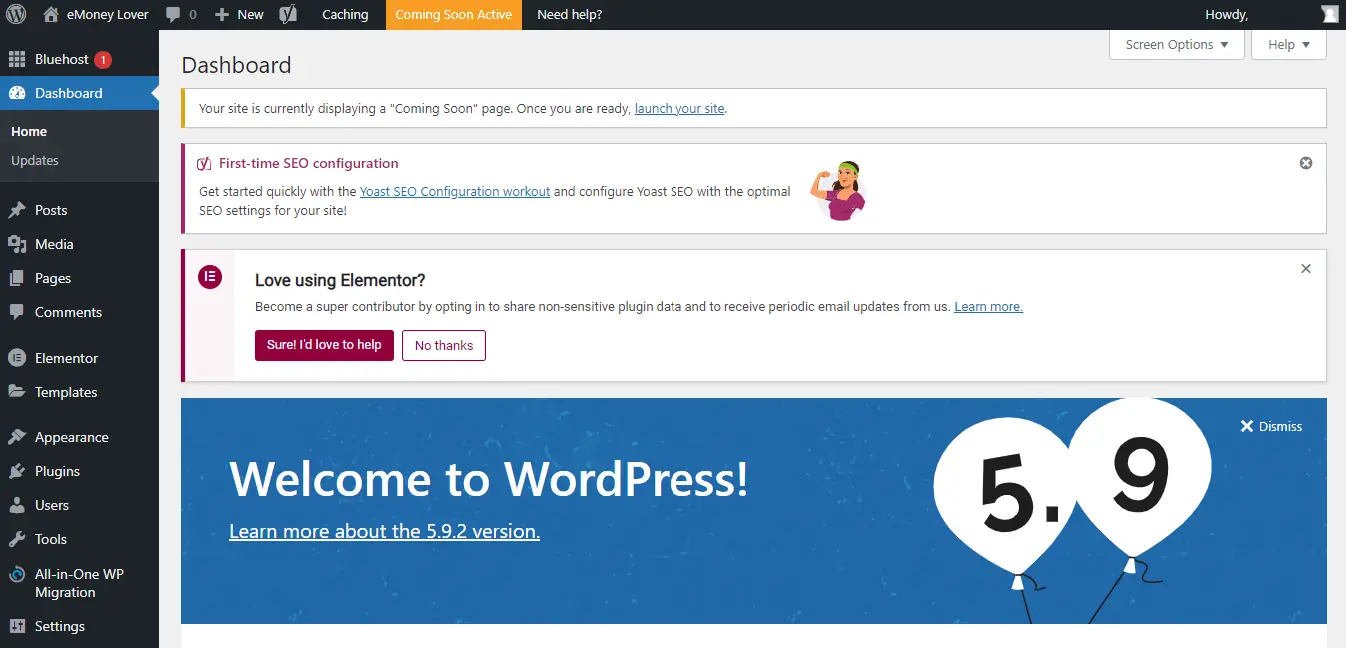
The WordPress dashboard is like the “behind the scenes” area where you make all the changes to your website. Hover over your domain/blog name in the top left corner and select Visit site to see what your website/blog appears like to the reader (front end).
To go back to the dashboard, hover over your blog’s name once more, and select Dashboard.
So, in a nutshell, when building your blog with WordPress, you will be alternating between the dashboard and front-end. After making adjustments in the dashboard, you head to the front to see how they look. Pretty easy, huh?
Before you start writing your posts, there are a few things you want to adjust
- You need to install some plugins.
- You need to change the theme of your website so that your blog looks aesthetically pleasing.
5. Install Important Plugins
Plugins are little bits of software that improve a WordPress website’s functionality. Without plugins, WordPress sites would be dull and not very easy to customize.
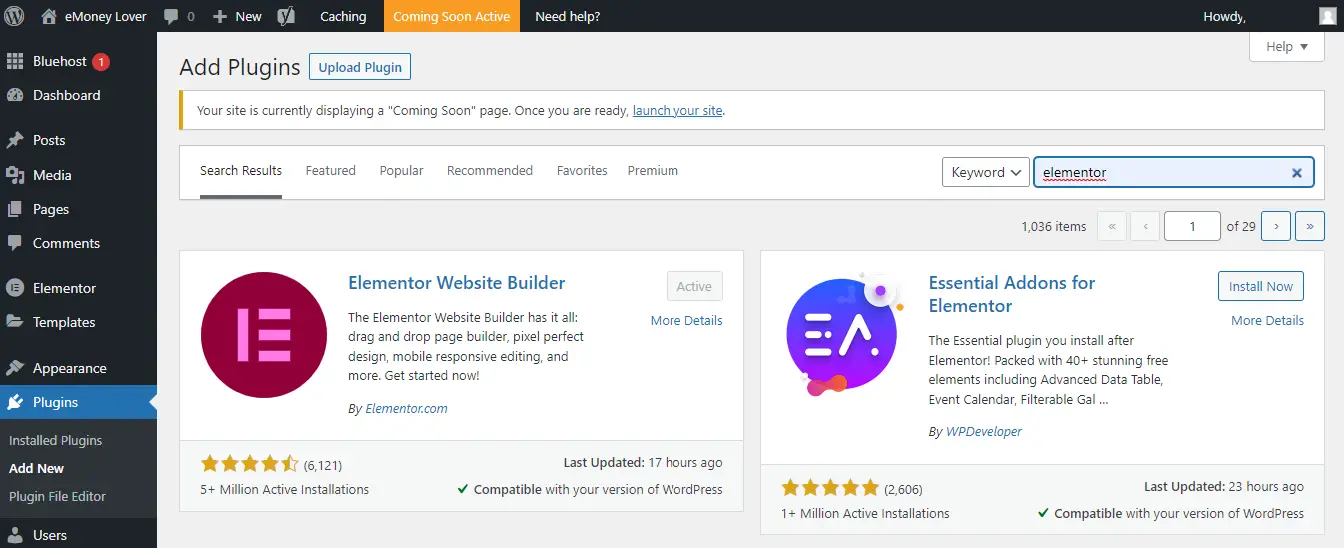
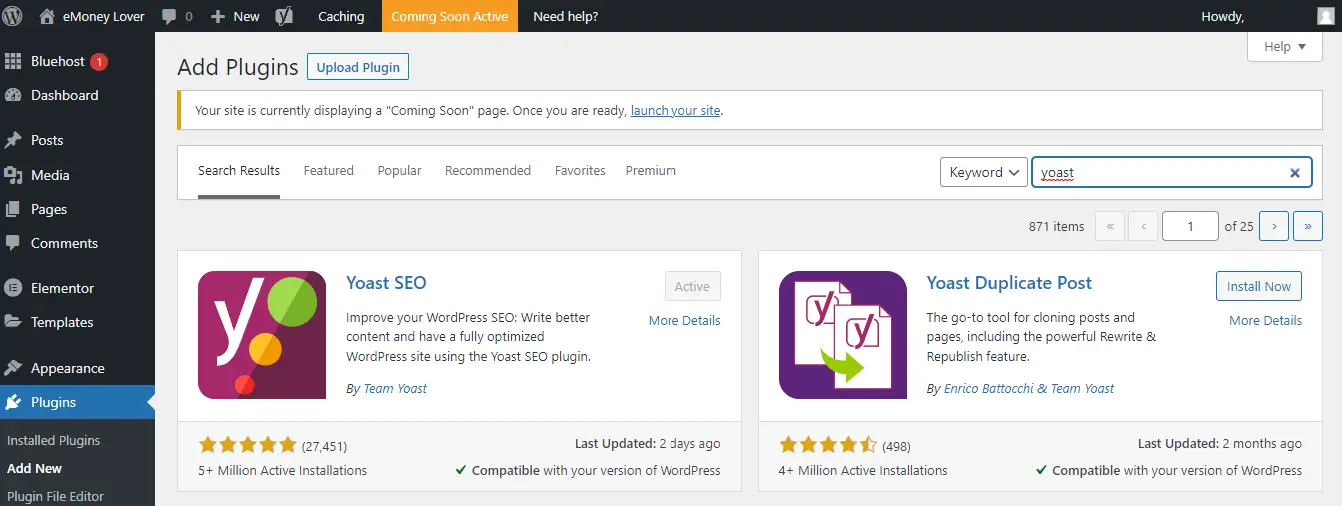
In order to operate a smooth site, I would recommend that any WordPress blogger install three plugins: WordPress Classic Editor, Elementor, and Yoast SEO.
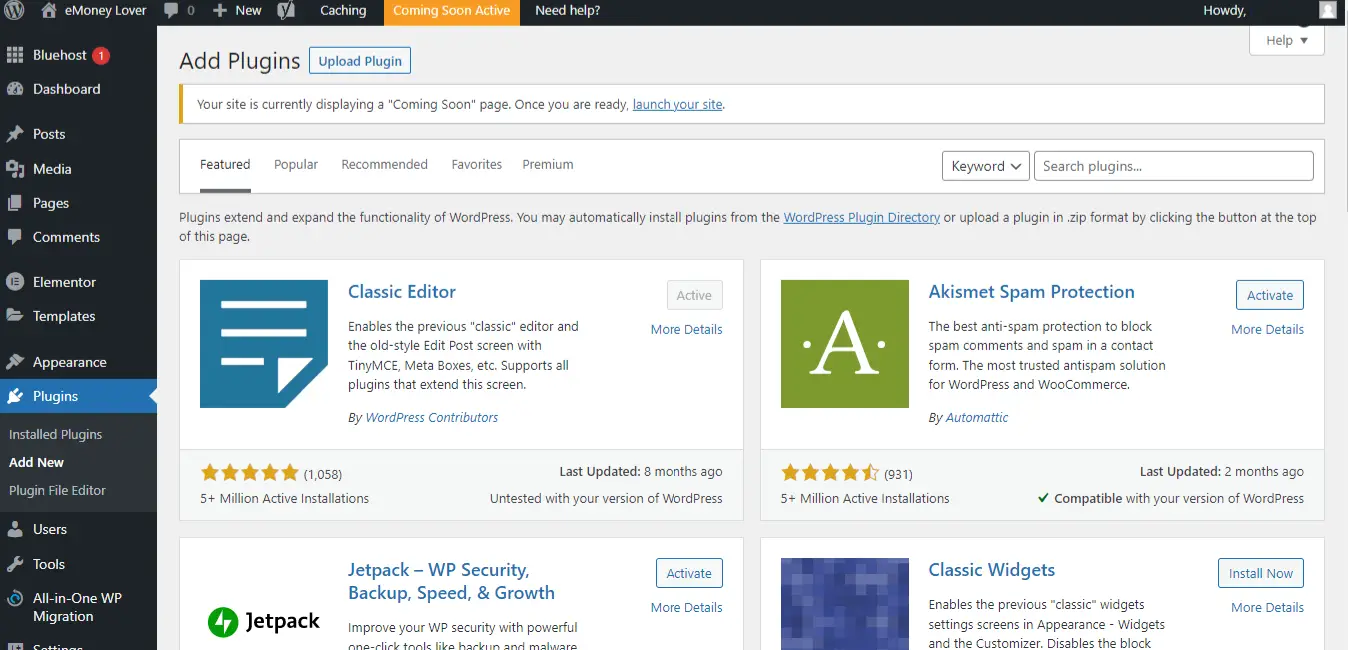
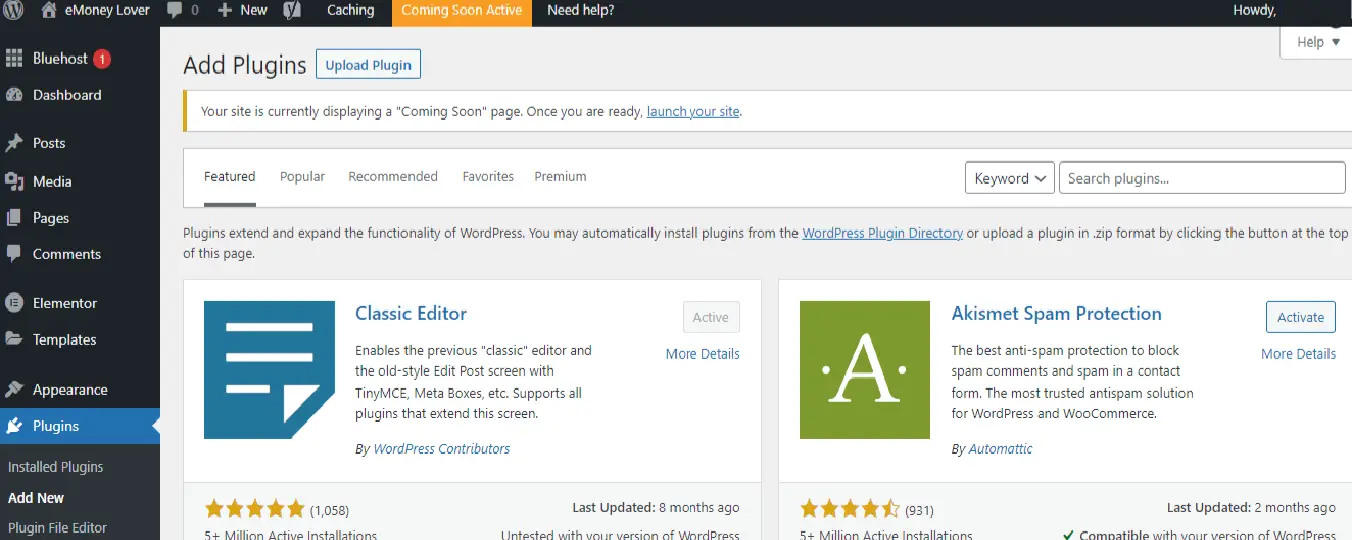
To install plugins, go to the side menu on your dashboard and select Plugins, then Add New. You will be taken to a page where you will be able to search for the 3 plugins that I mentioned. Install each plugin once you find it, and make sure to activate it.
Elementor is a visual drag-and-drop website builder that allows you to customize your website appearance from the front end. Most WordPress themes are built to specifically support this web builder.
WordPress Classic Editor is a plugin that restores the old “Edit/Create Post” screen. You may choose to use the default new post editor, but I think the classic editor is just clean and simple to use.
Yoast SEO helps you to track your Google SEO i.e., determining whether your website is completely optimized for the keywords that you wish to rank for.
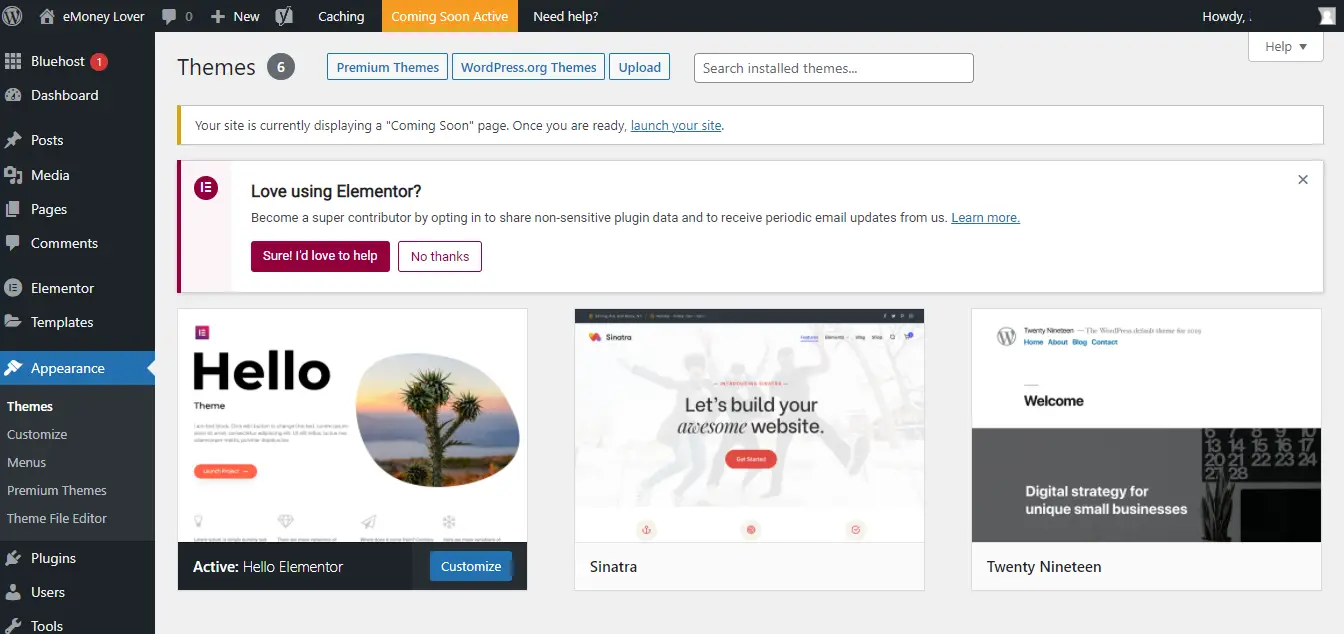
6. Customize your Website Design by Changing the Theme
Themes are pre-made website templates that help with website aesthetics. Without a theme, your blog would look bland. It would literally just be a bunch of dull text.
You want to make sure that your blog is eye-catching. It should have a well-designed framework, a logo, and some high-quality photos. A theme will help you with the framework. All you’ll have to do now is replace the theme’s logo, text, and images with your own.
Go to the dashboard menu and select Appearance -> Themes -> WordPress.org themes to install a theme. This will take you to a wide range of free WordPress themes that you can browse through and preview. Once you find the one you like, install and activate it.
7. Write Your First Blog Post
To start writing your posts, go to the dashboard menu and select Posts then Add New.
You will be led to a quite intuitive page where you will see a post title field and a text box where you can start typing your article. You may want to work offline because writing an article is not a 2-minute task.
I, therefore, suggest that you type your entire post on a text editor like Microsoft Word, then copy and paste the article onto the WordPress text editor when you’re done.
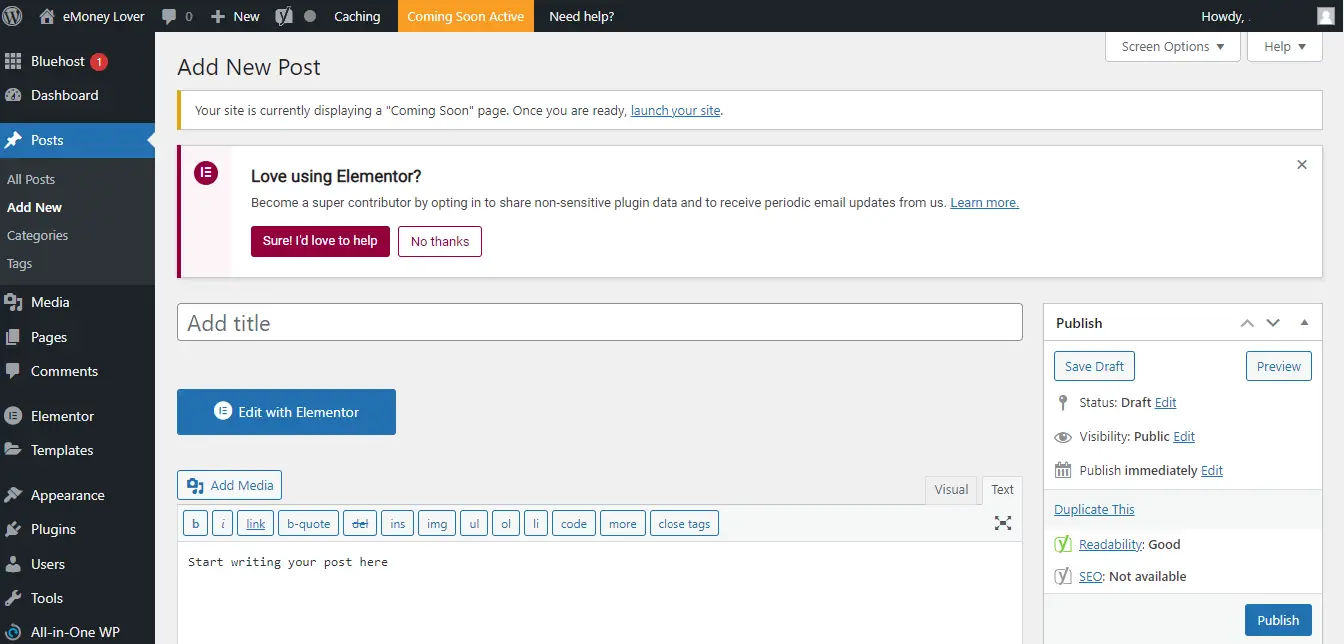
Once you’ve pasted your text into the WordPress editor, hit Publish, and your article will go live on your blog.
You can now launch your website to the world by clicking the orange “Coming Soon Active” button at the top of your dashboard. This button can be toggled on and off, and it’s very useful while your site is under maintenance, such as when you’re making design changes and only want to reveal your site once they’re finished.
Related Post: Blogging For Beginners: Blogging Terms Explained
Related Post: How to Make Money with Blogging: Top 5 Ways (in 2022)